
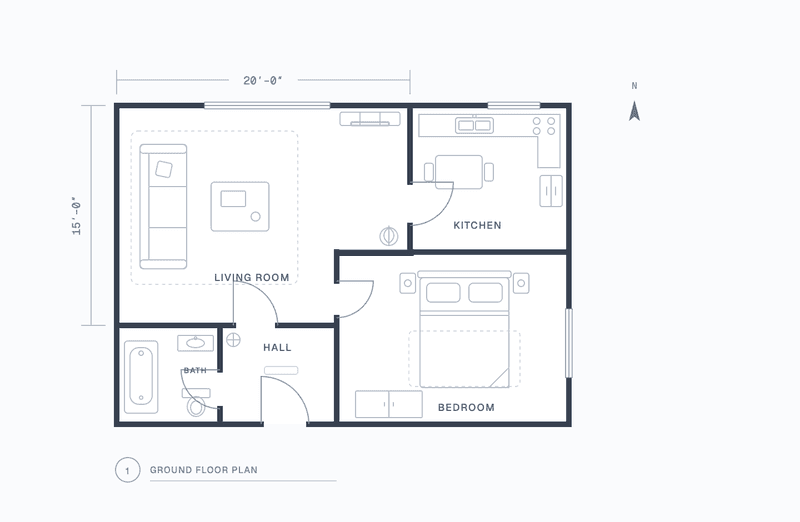
A rectangular room is one multiplication. Most rooms are not rectangles. Living rooms wrap around a kitchen, bedrooms have a closet notch, hallways jog, and older houses have angled walls and bay windows. This guide shows how to get a square footage you can trust for those rooms, using a floor plan and the Floor Plan Calculator.
Decide what the number is for
The same room has several correct areas. Pick the one that matches the job before you trace anything.
- Flooring, tile, and underlay: the inside floor boundary, wall to wall. Include closets if they get the same floor. Exclude built-in cabinets and islands only if the flooring stops at them.
- Paint: you need wall area, not floor area. Measure the perimeter with the length tool, multiply by ceiling height, and subtract doors and windows.
- Listing or appraisal: gross living area is usually measured to the outside of exterior walls and follows local rules such as ANSI Z765. That is a different number from the floor inside the room, so do not mix the two.
Set the scale from a known dimension
Open your plan in the calculator and set the scale with the longest dimension you can trust. A labelled overall wall length is ideal. A door opening works in a pinch, but a short reference magnifies any error: a quarter inch of drift on a 3 ft door is 0.7%, while the same drift on a 20 ft wall is 0.1%.
If the plan has a second labelled dimension, measure it with the length tool after calibrating. If it reads within 1% of the label, the scale is good.
Trace the room as one polygon
Do not break an irregular room into rectangles by hand. Use the polygon tool and click each inside corner in order, the way you would walk the wall. Close the shape and the calculator returns the area directly, whatever the shape.
Some corners to watch:
- Notches and closets: click into the notch and back out. A closet you want counted is part of the same polygon; a closet you do not want is simply left outside the outline.
- Angled walls: two clicks, one at each end of the angle. There is nothing to calculate.
- Bay windows: trace along the bay if it has finished floor at the same level. If it is a raised seat, leave it out.
- Curved walls: place a click every foot or so along the curve. Five or six points on a typical bow is well within 1%.
- Doorways: trace across the opening in line with the wall. Thresholds belong to the room on one side only, so do not count them twice when you measure adjoining rooms.
Worked example
The sample plan in the calculator has an L-shaped living room. Its outer dimensions are 20 ft by 15 ft, and a 5 ft by 5 ft corner is taken by the hall. Trace the six corners and the result is 275 sq ft: the 300 sq ft rectangle minus the 25 sq ft corner.
You can check that yourself with two rectangles, 20 × 10 = 200 and 15 × 5 = 75, but you do not have to. The point of tracing is that the arithmetic stops mattering once the shape gets awkward.
Open the sample plan to try it, or upload your own.
From area to an order
Flooring is sold with waste built in by you, not the supplier. Add an allowance to the measured area:
| Layout | Allowance |
|---|---|
| Straight planks or tiles in a rectangular room | 5% |
| Irregular room with several notches | 7 to 10% |
| Diagonal or herringbone pattern | 15% |
For the 275 sq ft room laid straight, that is about 290 sq ft of material. Round up to whole boxes using the coverage printed on the carton.
Common mistakes
- Measuring the drawing, not the room. Plans are often printed slightly off scale. Always calibrate with a labelled dimension rather than trusting the ruler on the sheet.
- Using the wrong boundary. Wall thickness is not floor. Trace the inside face of the wall for flooring.
- Forgetting the direction of doors. A door swing on the plan is not floor area. Trace straight across the opening.
- Mixing units. Switch the calculator between square feet and square metres rather than converting by hand.
Estimates from a plan are good enough to order from, but for tight tolerances, such as a single large tile layout, confirm two or three key dimensions on site before cutting anything.