
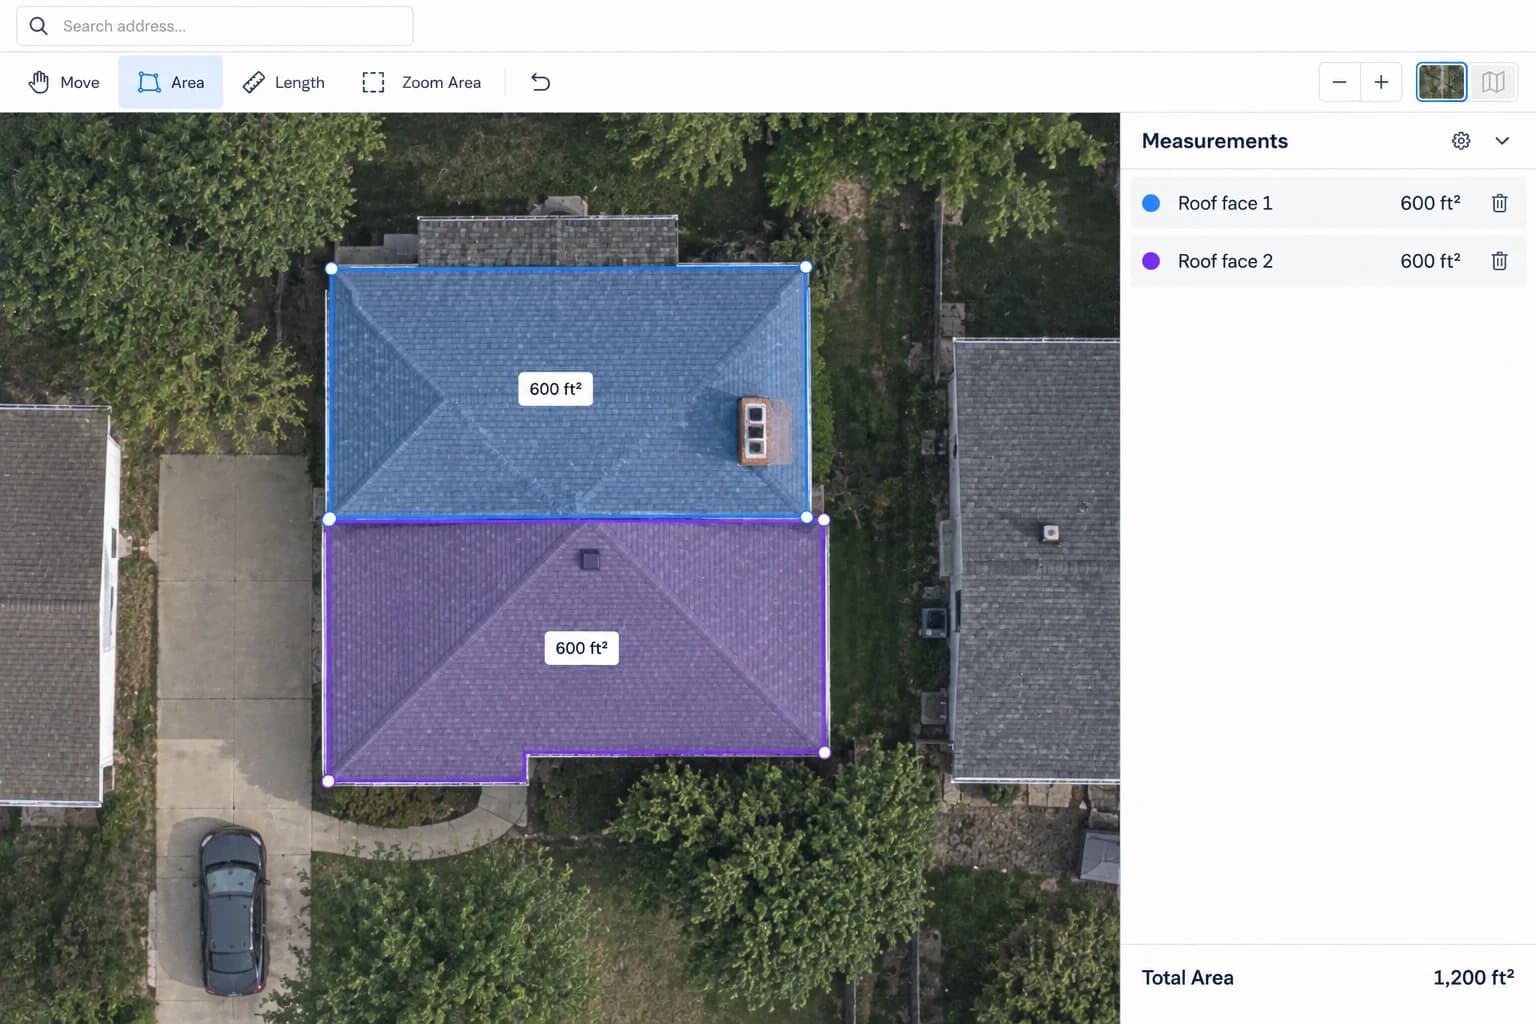
Start a solar roof estimate by measuring each roof face’s horizontal footprint, applying its pitch, and identifying obstructions. Area is a useful first check, but a panel layout also needs dimensions, orientation, shading, and local access requirements.
Use the Google Maps Area Calculator to trace the visible roof. Areaplane uses Esri satellite imagery; it does not automatically detect roof pitch or verify the roof’s structural condition.
Solar Roof Calculator
Solar Roof Calculator
Enter your roof details to estimate panels, system size, production, and battery needs.
Roof
System
Treat the calculator’s panel dimensions, spacing allowance, sunlight assumptions, and battery figures as editable planning assumptions. Verify current manufacturer specifications and local site conditions with an installer. Its production and battery outputs are estimates, not a design or a savings guarantee.
1. Measure Each Roof Face Separately
Search your address in the map tool, zoom in, and draw a polygon around each roof section. Avoid counting overhangs or dormer walls as usable panel space. Satellite imagery can be offset or obscure edges; compare dimensions against plans or an on-site measurement where possible.
2. Apply the Pitch to the Footprint
For a simple planar roof face, the slope multiplier is √(1 + (rise ÷ run)²). Use a verified rise and run, not a guess from a satellite image.
For a hypothetical 6:12 pitch, the multiplier is √(1 + 0.5²) ≈ 1.118.
| Step | Calculation | Example result |
|---|---|---|
| Horizontal footprint | 30 × 20 ft | 600 sq ft |
| Sloped surface | 600 × 1.118 | About 671 sq ft |
| Example exclusions, measured on the slope | 671 − 100 | About 571 sq ft |
The 100 sq ft exclusion is an illustrative input. Do not mix a horizontal exclusion measurement with a sloped total without converting it. Different roof pitches need separate calculations.
3. Identify Unusable Areas
Mark chimneys, vents, skylights, dormers, shaded areas, and equipment clearances. Ask your installer or local authority which fire access paths and setbacks apply; a single universal setback value is not appropriate for every roof.
Measure the length and width of the remaining spaces. Dividing total area by panel area cannot establish whether a row of real panels fits around obstructions.
4. Separate Panel Capacity from Energy Production
For arithmetic only, 12 panels rated at 400 W give a nameplate capacity of 4.8 kW. Actual production depends on location, pitch, orientation, shade, temperature, and equipment losses. Use current panel dimensions and a site-specific production model for a proposal.
Battery selection also depends on the loads you want to back up, their peak power, outage duration, and compatible equipment. Confirm these with your installer instead of selecting a battery from roof area alone.
Bring These Measurements to Your Installer
- A saved project with a named polygon for each roof face.
- Verified pitch, orientation, and approximate dimensions for each face.
- Obstructions and required clearances, with the measurement basis recorded.
- Your electricity usage and the loads you want to support during an outage.
Read the satellite measurement walkthrough for saving and checking map measurements. If you have a dimensioned roof plan, you can also use the Floor Plan Calculator.